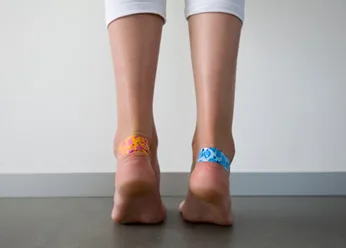
A friction blister—clinically classified as an intraepidermal bulla or mechanobullous lesion—is one of the most common acute dermatological injuries encountered in athletic medicine, occupational labor, and everyday life. Far from a simple cosmetic nuisance, a blister represents a precise mechanical shear failure within the epidermis, where repetitive frictional shear stresses rupture desmosomal intercellular connections within the stratum spinosum. The resulting cleft rapidly fills with sterile, protein-rich serous transudate derived from dilated dermal microcapillaries. Navigating optimal blister rehabilitation requires resisting the temptation to aggressively deroof the lesion, and instead executing 5 clinically verified dermatological steps: friction de-loading, sterile dependent decompression when indicated, antiseptic barrier preservation, hydrocolloid occlusion, and rigorous surveillance for secondary bacterial cellulitis.
Dermal Wound Healing & Sterile Protocol Takeaways
- The Sterile Biological Dressing: The intact blister roof (stratum corneum and upper granulosum) is the human body’s best natural sterile biological dressing; leaving it intact prevents bacterial inoculation and halves healing time.
- The Dependent Drainage Technique: If a tense, painful blister threatens to rupture traumatically, decompress it using a sterile needle inserted horizontally at the lower edge, preserving the overlying skin flat against the wound bed.
- The Hydrocolloid Advantage: Moisture-retentive hydrocolloid dressings provide an optimal moist wound-healing microenvironment that accelerates epithelial cellular migration by up to 40% compared to dry gauze.
Biomechanical Pathophysiology: Shear Force and Epidermal Cleavage
Friction blisters do not develop from pure perpendicular pressure; they are generated by repetitive cyclic tangential shear forces applied across the skin surface. When unyielding footwear or athletic equipment rubs against the stratum corneum, high frictional resistance (Ff = μN) holds the outer keratinized layers stationary while underlying viable epidermal layers are pulled laterally.
Because the stratum spinosum possesses lower cohesive shear strength than the heavily keratinized stratum corneum above or the basal lamina below, repeated micro-trauma shears intercellular desmosomal bridges apart (acantholysis). This intraepidermal cleavage space creates a localized hydrostatic pressure void that rapidly pulls extracellular serous fluid and plasma proteins from adjacent papillary dermal capillaries, forming a tense fluid pocket. For individuals prone to localized pedal skin fissures, explore our related guide on antifungal protocols for athlete’s foot and pedal skin infections.
According to clinical wound care literature published by the Journal of the American Academy of Dermatology (JAAD) / NCBI, stripping the epidermal roof off a fresh blister leaves raw dermal nerve endings exposed and increases the risk of secondary bacterial superinfection with Staphylococcus aureus and Streptococcus pyogenes by more than 80%.
“A friction blister is an intraepidermal cleavage plane caused by repetitive shear stress across stratum spinosum keratinocytes; preserving the sterile epidermal roof remains the single most effective biological dressing to prevent microbial inoculation and accelerate keratinocyte re-epithelialization.”
5 Evidence-Based Dermatological Steps to Treat Blisters
Integrative dermatological wound care requires following a structured, step-by-step clinical protocol to optimize healing speed and prevent infection:
1. Immediate Friction De-loading and Intact Epidermal Roof Preservation
The moment an acute blister or erythematous “hot spot” is identified, all localized mechanical friction must cease immediately. Continued rubbing will traumatically deroof the lesion, transforming a closed, sterile biological wound into an open, painful ulcer.
For small, painless, non-distended blisters (<1 cm), the golden dermatological rule is: Leave the skin completely intact and unpopped. The blister roof acts as a sterile biological barrier that keeps airborne pathogens out while keeping serous growth factors in contact with the regenerating basal layer. Protect the intact blister with a doughnut-shaped moleskin ring or cushioned adhesive bandage that transfers friction away from the lesion.
2. Sterile Dependent Decompression (When Blister Rupture Is Inevitable)
When a large, tense, highly painful blister forms over a high-load weight-bearing area (such as the heel, plantar surface of the foot, or palm of the hand), leaving it intact often results in catastrophic, uncontrolled tearing during physical movement. In such cases, controlled sterile drainage is medically warranted.
Execute the following sterile puncture protocol:
- Thoroughly sanitize the blister and surrounding cutaneous area with 70% isopropyl alcohol or povidone-iodine, allowing it to air-dry completely.
- Sterilize a sharp surgical blade or 20–25 gauge stainless steel hypodermic needle (use a single-use sterile packaged needle, or disinfect thoroughly in rubbing alcohol).
- Insert the needle horizontally at the lowest, dependent margin of the blister base, puncturing the skin in one or two small spots.
- Gently depress the blister roof using a sterile gauze pad to evacuate all serous fluid. Crucial redline: Absolutely do not cut or peel away the collapsed overlying skin; smooth the empty skin roof flat against the wound base to serve as an organic biological dressing.
3. Antiseptic Cleansing and Moisture-Retentive Emollient Application
Once the blister is drained, cleanse the area gently with sterile physiological saline or mild soap and water. Never pour caustic household chemicals—such as 100% undiluted hydrogen peroxide or 90% rubbing alcohol—directly into open, denuded wound beds. While these chemicals kill bacteria, they are cytotoxic to human fibroblasts and keratinocytes, delaying tissue granulation and exacerbating chemical inflammation.
Instead, apply a thin layer of pharmaceutical-grade white petrolatum (Vaseline) or a medical-grade hydrogel. Petrolatum maintains essential moisture vapor transmission rates without causing sensitization, preventing the collapsed epidermal roof from adhering permanently to dry overlying gauze. For complementary natural soothing emollients that protect cutaneous barrier lipids, see our overview on the dermatological and emollient properties of pure olive oil.
4. Hydrocolloid Dressing Occlusion and Second-Skin Healing
Traditional dry woven cotton gauze dressings allow wound fluids to evaporate, forming hard, crusty eschars that impede keratinocyte migration across the wound bed. When dry dressings are ripped off during changes, newly regenerated epithelial cells are stripped away, resetting the healing clock.
Modern dermatological wound care relies on hydrocolloid adhesive dressings (commonly known as blister bandages). Composed of hydrophilic carboxymethylcellulose particles embedded within an elastomeric polymer matrix, hydrocolloid bandages react with wound exudate to form a soothing protective gel. This maintains a warm, slightly acidic, moisture-retentive microenvironment that stimulates keratinocyte mitosis, cushions against shearing forces, and accelerates complete dermal re-epithelialization by up to 40%. Leave the hydrocolloid dressing in place for 3 to 5 days until its edges lift naturally.
5. Clinical Surveillance for Microbial Superinfection (Cellulitis Redlines)
Because the skin barrier is physically compromised, blisters represent an open portal of entry for opportunistic pathogens, particularly Staphylococcus aureus and Group A Streptococcus. Continuous monitoring for signs of localized or spreading infection is critical.
If you observe expanding erythematous margins spreading beyond the blister border (>1 to 2 cm), localized throbbing pain, palpable cutaneous heat, cloudy purulent yellow/green drainage, or ascending red streaks (lymphangitis) traveling toward regional lymph nodes, secondary cellulitis has developed. Seek immediate medical attention for oral antibiotics. Those managing broader skin barrier healing protocols can also review our evidence-based guide on topical antimicrobial solutions and skin safety.
Evidence Matrix: Blister Treatment Protocols & Clinical Actions
| Clinical Stage | Physiological / Wound Mechanism | Evidence-Based Best Practice Protocol | Common Pitfall & Safety Redline |
|---|---|---|---|
| 1. Intact Small Blister (<1 cm) | Sterile biological seal preserves serous growth factors and intact basement membrane. | Leave completely intact; protect with surrounding moleskin doughnut ring. | Popping small, non-painful blisters out of habit invites bacterial superinfection. |
| 2. Large, Tense Painful Blister | High hydrostatic pressure threatens traumatic tearing and deeper dermal damage. | Disinfect margins; puncture dependent edge with sterile needle; press roof flat. | Never tear, cut, or deroof the overlying skin; preserve the roof as a biological dressing. |
| 3. Cleansing & Emollient | Maintains physiological moisture; prevents mechanical adherence of bandages. | Cleanse with sterile saline; apply thin film of sterile white petrolatum ointment. | Avoid pouring harsh hydrogen peroxide or rubbing alcohol into raw denuded wounds. |
| 4. Occlusive Barrier Protection | Carboxymethylcellulose forms gel; accelerates keratinocyte re-epithelialization by 40%. | Apply sterile hydrocolloid blister bandage; leave undisturbed for 3–5 days. | Do not rip dressings off prematurely; wait until adhesive edges loosen spontaneously. |
| 5. Infection Surveillance | Bacterial inoculation by S. aureus or Streptococcus risks acute spreading cellulitis. | Inspect borders daily for spreading redness, purulence, localized warmth, or red streaks. | Ascending lymphangitic streaks or systemic fever require immediate emergency physician care. |
Disclaimer: This article is for informational purposes only and is not intended as medical advice. Individuals with peripheral neuropathy, peripheral artery disease (PAD), or diabetes mellitus must seek professional podiatric or medical care for all blister management.
Frequently Asked Questions (FAQ)
Why should individuals with diabetes never pop or self-treat foot blisters?
Individuals diagnosed with diabetes frequently suffer from diabetic peripheral neuropathy (loss of protective pain sensation) and microvascular peripheral arterial disease (diminished capillary blood flow to the extremities). An unnoticed or self-punctured blister on a diabetic foot can fail to heal due to ischemia, rapidly evolving into a deep neuropathic diabetic foot ulcer, bacterial osteomyelitis (bone infection), and potential limb-threatening gangrene. Any diabetic foot blister warrants immediate medical evaluation by a podiatrist.
What is a ‘blood blister’ and how does its management differ from a regular friction blister?
A blood blister occurs when mechanical trauma or intense pinching ruptures dermal capillary loops located deep in the dermal papillae, spilling whole blood into the cleavage cleft alongside serous fluid. Because a blood blister involves deeper dermal tissue, you should never puncture a blood blister at home. Draining a blood blister opens a direct vascular pathway for cutaneous bacteria to enter the bloodstream. Keep blood blisters clean, padded, and allow the pooled blood to resorb naturally.
How can athletes effectively prevent friction blisters during marathons or long hikes?
Preventing blisters requires minimizing the coefficient of friction and controlling cutaneous moisture. Effective strategies include: wearing seamless, synthetic moisture-wicking socks (such as merino wool or polypropylene, never 100% moisture-trapping cotton); using a dual-sock system (thin liner sock paired with a cushioned outer sock); pre-taping known high-friction anatomical hot spots with flexible kinetic tape or pre-cut hydrocolloid bandages; and applying a silicone-based anti-friction lubricant over toes and heels before activity.